Out of sight, out of mind (so clear your desktop now)

It’s simple, really: if your desktop is messy, then it’s more difficult to use. Don’t waste time and energy struggling to function — literally clean up your act by heeding our tips on decluttering your desktop. 1. Arrange, sort, and prioritize Before you go about deleting everything from your desktop, think about what you really want to keep. This will vary from person to person, but most people use their desktop for storing files, folders, and app shortcuts that they want to access quickly. Take the time to prioritize your files and folders. An easy way to do this is to right-click on an empty area of your desktop (where there are no icons) and select Auto arrange icons. This will organize your icons into a grid format that makes it easier for you to see and work with them. Then, right-click on the empty space and hover your mouse over Sort by and select Date modified to arrange the icons by the date they were last opened, with the latest on top. 2. Create a folder for holding files and another for keeping app shortcuts People often use their desktop to hold files like downloads, photos, screenshots, and even email attachments. This can lead to a messy desktop in a short period of time. In truth, you probably don’t need all these shortcuts on your desktop. Instead, create a folder on your desktop that will serve as your dumping ground for all your nonessential files and folders. If you don’t intend to keep a file, icon, photo, etc. for long, put it in this folder. Revisit this folder every once in a while to delete the files you no longer need. It also helps if you create a shortcut folder. When you install new programs on Windows, a shortcut icon is often automatically added to your desktop. However, these desktop shortcuts should be for frequently used programs only. Create a separate folder for programs that aren’t used that often. 3. Be ruthless in cleaning Once you have your folders set up, it’s time to get rid of the clutter. If you haven’t used a file, folder, etc. in the past two months or so, you should seriously consider getting rid of it. Examine your desktop and be ruthless in cleaning: Uninstall programs you no longer use. Delete unimportant files, such as screenshots you no longer need. Place the rest in relevant folders. Once you’ve completed these, check your browser to see where it stores downloaded files. If your browser downloads files onto your desktop by default, go to Settings and change the target location to the Downloads folder. 4. Maintain order Once you have decluttered your desktop, you must stick to the rules you’ve made. Whenever you download something, ask yourself whether this should go to the desktop, your dumping folder, or someplace else. Of course, sticking with these rules won’t always be easy, so take time once or twice a month to revisit your desktop and clean it up a bit. 5. Use the taskbar or Start menu for apps With Windows 10, you can pin apps to the Start menu and the taskbar. This is a great alternative to having program shortcuts on your desktop. To pin apps, open your apps list (i.e., click the Start menu icon at the bottom left corner of the screen) and right-click on the application you would like to pin. Simply select Pin to Start or Pin to taskbar for the option you want. 6. Choose a wallpaper you love looking at An interesting way to minimize clutter is to pick a wallpaper that you enjoy looking at — whether it’s your favorite slogan, a photo of your family, or a picture of your dream house, car, or destination. Having an image you like serves as a reminder to keep icons to a minimum, so if you can’t see the image anymore, then you have too many icons, and it may be time to get rid of a few. If you are looking to learn more about using Windows in your office, contact us today to see how we can help. Published with permission from TechAdvisory.org. Source.
Reasons you should switch to the new Microsoft Edge

Microsoft has just leveled the playing field for web browsers by bringing major changes to Microsoft Edge. The internet browser’s stunning new features help users stay organized and save time as well as protect their online data and identity. If you haven’t tried the upgraded browser yet, now is a great time to check it out. 1. Collections Collections allows you to gather information from different sites, then organize, export, or return to it at a later time. Doing these can be especially difficult if you’re working across several sites and multiple devices. To use this feature, simply click on the Collections button and a pane will open on the right side of your browser window. Here, you can easily drag and drop web pages, text, images, videos, and other elements into a group, which you can then import to a Word document or Excel workbook. 2. Vertical tabs Vertical tabs are a handy feature if you often find yourself opening dozens of tabs at once at any given time. Instead of having to hover over or click on one to see which page it’s on, you can easily find and manage your tabs on the side with a single click. You’ll never have to lose track of or accidentally close tabs again. 3. Smart Copy How often do you copy content from the web and paste it into a document only for it to become an ugly mess of text that needs to be cleaned up? This won’t be a problem if you use the new Microsoft Edge. The Smart Copy feature makes it easier to select, copy, and paste web content — including any images or links — while preserving its formatting. 4. Tracking prevention Whenever you visit a site, online trackers can collect information about your internet activity, including pages you visit, links you click on, your search history, and more. What’s alarming is that they can do this even when you’re not on the site. Companies then use the data collected to target you with personalized advertisements and experiences. This can seem highly intrusive, if not downright creepy. The new tracking prevention feature in Microsoft Edge is designed to keep you from being tracked by sites that you aren’t accessing directly. It’s enabled by default, and it gives you control over the types of third-party trackers to be detected and blocked, thereby enhancing your online privacy. 5. Password Monitor Millions of online personal credentials are frequently exposed due to data breaches and sold on the dark web. To keep your online accounts safe from hackers, Microsoft developed the Password Monitor. When enabled, this feature notifies you if the credentials you’ve saved to autofill is on the dark web. It then prompts you to take action, allowing you to view a list of all the leaked credentials and then leading you to the respective site to change your password. 6. InPrivate mode enhancements Sometimes, you may want extra online privacy when browsing the internet, especially if you’re sharing devices with other people. When you use the InPrivate mode, your history, cookies, and site data are automatically deleted once you finish a web browsing session. What’s more, your searches aren’t tied to your account, so you don’t have to go through the hassle of deleting your search or browser history. 7. Immersive Reader Built into the new Microsoft Edge, Immersive Reader makes reading online easier and more accessible by removing distractions on the page and creating a simplified environment that helps you to focus. This feature also gives you access to a variety of capabilities, including hearing text read aloud or adjusting the text size. 8. 4K and Dolby Audio If you enjoy binge-watching the latest series on Netflix or just want a high-definition entertainment experience when viewing content online, then this feature is for you. Microsoft Edge is the only browser on Windows 10 that lets you watch Netflix in stunning 4K resolution and supports Dolby Audio and Dolby Vision. 9. Give with Bing Bing now comes with a Give Mode feature that allows you to support the causes you care about by simply searching using the search engine. As part of the Microsoft Rewards program, you can earn reward points for searches and donate these points to one out of more than a million nonprofits to choose from. This includes the CDC Foundation and other organizations supporting the COVID-19 response. 10. Easy switching Microsoft Edge is available to download for Windows, Mac, iOS, and Android. What’s great is that you can easily copy or migrate your bookmarks, form fill information, passwords, and basic settings to the new Microsoft Edge with just a single click. If you want to learn more about the latest features of Microsoft Edge and how to enjoy these benefits on your business computers, give us a call today. Published with permission from TechAdvisory.org. Source.
Speed up your Windows 10 PC with these tips

When your computer shows signs of slowing down, don’t feel compelled to buy a replacement just yet. You can still speed up your machine — and do it for free, too. We’ve listed four effective tips to make your Windows 10 computer faster: Prevent programs from launching at startup Windows makes certain programs readily available by loading them at startup. While Microsoft likely has good intentions for doing this, this auto-launch feature slows down your computer. To fix this issue, you’ll need to adjust your settings. Open the Task Manager by pressing Ctrl+Shift+Esc to see the programs that launch during startup. On the startup tab, you can easily disable any programs you don’t want launching at startup, such as media players and optional accessories that don’t have to be active all the time. But to be on the safe side, keep essential apps, such as antivirus software, enabled. Get rid of useless applications Having too many programs installed on your computer uses up valuable memory and hard disk space. This slows down your computer and makes the machine work harder than necessary. Quickly uninstall programs you don’t need by following these steps: Tap the Windows key on your keyboard and type “Add or remove programs” (this will show you all the apps stored in your computer). A link to the system settings will appear. Click on the link. Select the program/s you no longer want, and click Uninstall. Once you do this, you’ll then be guided through several steps to complete the uninstallation process. Organize your disks It’s important to regularly clean out your computer of data you don’t need. Thankfully, Microsoft’s Disk Cleanup tool makes it easy to do so. To find the tool, tap on the Windows button on your keyboard and type “Disk Cleanup.” If you click on the link, the tool will automatically find files that take up too much memory space, such as temporary Internet and system memory dump files. Just click OK to send these files to your Recycle Bin. Turn off apps running in the background You may not know it, but there are a lot of programs running in the background as you use your computer. Microsoft enabled their native universal apps to do this so you can quickly access their features. However, this also slows down your CPU. Disabling them will reduce the burden on your computer and speed it up. To find out what programs are running in the background, press the Windows button on your keyboard and type “Background apps.” Find the programs you don’t need running and toggle the On-Off button. By following these four steps, you’ll see a noticeable difference in the speed of your PC. If you want to learn how to optimize your Windows system further or need assistance with your other Microsoft products, give us a call. Published with permission from TechAdvisory.org. Source.
Turn off invasive Windows 10 settings in four steps

Windows 10 has become the operating system (OS) of choice among business and personal users. Despite the many improvements to the OS that Microsoft has rolled out, Windows 10 isn’t perfect. In fact, many users have complained about its intrusive default privacy settings. Luckily, you can easily turn these settings off to ensure your privacy. Turn off personalized advertising Windows 10 assigns each user an advertising ID to personalize their ad experience based on their recent browser history. You can turn off the advertising ID feature by doing the following: Click Start > Settings > Privacy > General. Toggle off the option “Let apps use my advertising ID for experiences across apps.” This will reset your advertising ID. If you don’t want to receive locally relevant content from websites, toggle off the option “Let websites provide locally relevant content by accessing my language list.” Disable Cortana Microsoft has ventured into the market of voice-controlled virtual assistants with Cortana. This personal assistant allows users to set reminders, schedule events, and send emails, among other tasks. Every time you use Cortana, it collects information about your computer activity — “learning” it, so to speak — to improve user experience. But if you find this feature intrusive, you can disable Cortana completely with these steps: Search for the Windows Registry editor in the Windows search bar, or press Windows + R, type “regedit,” and click OK. Copy and paste HKEY_LOCAL_MACHINESOFTWAREPoliciesMicrosoftWindows into the address bar at the top. Look for the Windows Search folder. If it doesn’t exist, create it by right-clicking the right-hand pane, then choose New > Key. Rename the folder “Windows Search”. Select the Windows Search folder, then right-click the right-hand pane and select New > DWORD (32-bit) Value. Name it “Allow Cortana,” and make sure the Value Data is set to zero. Restart your computer. Stop peer-to-peer (P2P) file sharing Windows 10’s P2P file sharing feature enables your PC to share downloaded updates with other Windows 10 users by default. This helps other users update their systems faster and speeds up your upgrade downloads. To turn it off, do the following: Go to Settings > Update and Security > Windows Update > Advanced Options > Choose how updates are delivered. Note that the default setting is “Updates from more than one place.” If you want to disable this feature entirely, toggle off this option. If you want to share your files with PCs on your home network, leave this feature on and select PCs on my local network. Change Microsoft’s Edge settings Microsoft’s relaunched browser is chock-full of features, such as web experience personalization and typing prediction. Such features may make you uncomfortable since they all send back data to Microsoft. Here’s how to turn them off: Open Edge and click on the menu icon (three dots) in the upper right corner. Next, click on Settings > Privacy and services. Scroll down and switch on the “Send ‘Do Not Track’ requests” option. There’s also a bunch of privacy and services settings that you may want to disable, such as tracking services, navigation error resolution, block potentially unwanted apps, and more. For more tips on keeping Microsoft from tracking your online activity and more information about how to safeguard your security and privacy, drop us a line today. Our experts will be more than happy to help! Published with permission from TechAdvisory.org. Source.
Why the latest Windows 10 update is blocked on some PCs

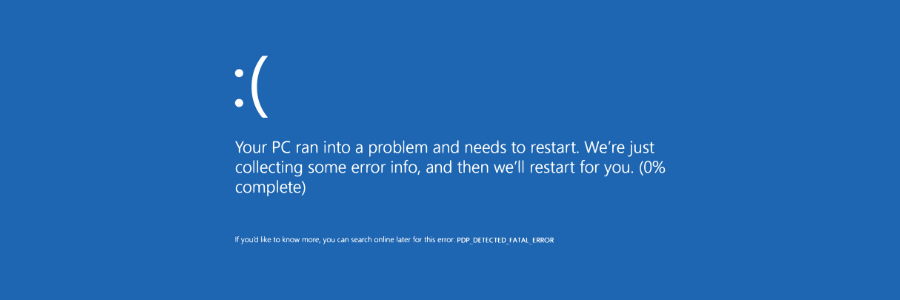
Last week, Microsoft unveiled the May 2020 Update, which is the latest version of Windows 10. While some users are able to update their systems, some PCs are prevented from installing it. Here’s what’s causing the update block, and how you can bypass it. Known issues The update block is present on devices such as the Surface Pro X and 7, Surface Laptop 3, and Surface Book 3, according to a test by The Verge. The block is also present on other devices with the following configurations: PCs with games using GameInput Redistributable. Installing the Windows 10 May 2020 Update on these systems may result in mouse input loss. Always On, Always Connected PCs. Devices with more than one Always On, Always Connected network adapter may experience unexpected restarts. PCs with integrated Intel graphics. Systems may encounter substandard variable refresh rates after installing the update. Systems with Conexant or Synaptics audio drivers. PCs may display a blue screen of death (BSOD) error message if the May 2020 Update is installed. PCs with older drivers for Nvidia display adapters. Devices with GPU drivers with a version below 358.00 may encounter some performance issues. Devices using Thunderbolt docks. PCs may display a BSOD error message if the May 2020 Update is installed. PCs with certain Realtek drivers. These Windows 10 devices may be unable to connect to more than one Bluetooth device. Microsoft has also identified issues with the Deployment Image Servicing and Management (DISM) service and Input Method Editors (IME) with the Windows 10 May 2020 Update. If your PC has not yet received any update notification, or if you’ve checked for updates on Windows Update without any luck, it’s likely that your device is encountering issues with the May 2020 Update. As a result, Microsoft is only offering the update to compatible devices and currently resolving issues on other PCs. How to bypass the update block If your device is currently blocked but you still want to install the May 2020 Update, you can get it through the Windows 10 Update Assistant. Here’s how to do it: Go to the Windows 10 download page. Under the header “Windows 10 May 2020 Update,” click on the Update now button and wait for a file to download. Open the file. This will bring up the Windows 10 Update Assistant program. The program will check for updates. Click on the Update now button once done. The tool will check if your system meets the update requirements. Click Next. Wait for the program to download and install the Windows 10 May 2020 Update. You can also download Windows 10 through Microsoft’s Media Creation tool to use on another PC, burn to a DVD, or save to an external hard disk or thumb drive. We advise you take extra precautions, however, especially if Windows found potential compatibility problems with your system. If you want to learn more about the latest Windows 10 update and how to deploy it on your business PCs, give us a call today. Published with permission from TechAdvisory.org. Source.
New Windows 10 update: Things you need to know

The Windows 10 update will roll out on May 26–28, 2020 and will bring about a fresher look for the world’s most popular operating system. Aside from updates to Windows 10’s interface, here are some functionality improvements you can expect. The update — named Windows 10 20H1/Windows 10 version 2004 — will feature some performance-enhancing upgrades and an initial rollout of new designs. These are aimed to unify Windows applications with those used on mobile devices and the like. Fluent Design Fluent Design is an open-source, cross-platform design system that developers can use to craft multiple-device software and applications. Basically, it helps developers keep their application designs unified across several platforms while enhancing overall aesthetic and user experience. In the upcoming OS update, users will experience some of the first native releases of Fluent Design-optimized applications, specifically Microsoft Office applications, Microsoft Store, Paint, and more. Expect to see refreshed icons and interfaces of your favorite Microsoft apps. Users will also notice that the new designs will stay uniform from platform to platform, whether they use it on a PC, Mac, or other operating systems. Cortana migration Users will also notice changes to the Start Menu — Cortana will no longer be docked to the start button, and the new design will feature new ways to interact with Microsoft’s digital assistant. Text-based chat interaction will now be available as well. Microsoft is in the process of making Cortana into a personal productivity assistant for Microsoft 365 applications, so most of its new processing powers will revolve around improving the 365 experience for users. The update also brings about improved smart prompts that let the virtual assistant type out and send emails, adjust computer settings, open apps, and schedule events via voice commands. Windows Search Microsoft is constantly finding ways to improve its Search tool for Windows 10. In this update, users will experience improved indexing and search speeds, as well as a smart indexing feature that limits activity to off-peak hours so that it doesn’t disrupt daily use. This will result in faster performance for laptops of all levels, especially those that still utilize HDD storage. Where to download Users can download the feature update via Windows Update, a built-in tool in existing Windows 10 systems. You can access this by clicking Start > Settings > Windows Update. You can also type Windows Update on the search bar (beside the Windows button on the lower-left corner of the screen) and follow the easy instructions. If you opted for automatic updates, all you’ll have to do is sit back and wait. For manual updates, you’ll need to click on Check for Updates. Users can also get it through the Windows Insider Program. Simply go to Settings > Update & Security > Windows Insider Program and click on Get Started. Call us today for all your Office 365 needs. We’ll help you get set up in no time. Published with permission from TechAdvisory.org. Source.
Be careful of April’s Windows 10 update
Microsoft’s operating system is one of the best on the market, but it does have flaws. Software updates have been a regular problem for Windows 10 and the April 2020 update is a little worse than usual. Here’s what you should know to minimize possible disruptions. What are the issues? The April Windows 10 update has a few problems. First, it is causing an abnormally high number of computers to crash and display the “Blue Screen of Death.” Although those issues are unfortunately common among Microsoft’s operating system updates, they’re worse this time around. In rarer cases, users are reporting that the update is deleting images, videos, and documents from their hard drives. There are also stories of the update causing computers to continually restart themselves or display the message “No operating system could be found.” How you can prevent a faulty update There are only a couple of options for avoiding this update and it’s crucial to understand that those options come with cybersecurity risks. As with most Windows 10 updates, April’s included several fixes for security vulnerabilities, and postponing the installation means avoiding important patches. Contact our team about data backups and network security before following these steps: Click the magnifying glass icon on your Windows taskbar. Type and then select “View your Update history.” Click Uninstall updates. Scroll to the Microsoft Windows segment at the bottom of the list. If one of the updates is KB4549951… The problematic update has already been installed on your computer. You can select it and click Uninstall to remove the update. However, if more than 10 days have passed, you cannot uninstall the update. If KB4549951 has not been installed yet… Click on the magnifying glass icon on your taskbar and type “Windows Update settings.” Then, you should see the option to Pause updates for 7 days. Alternatively, you can delay updates until a specific day (as long as it’s no longer than 35 days from today) from the Advanced options window. When in doubt, ask the experts Software updates should be installed as quickly as possible to prevent a data breach at your organization. If you’re concerned that installing a software update may slow down your computers or result in data loss, give us a call immediately. Our technicians can keep your data safe and your employees productive. Published with permission from TechAdvisory.org. Source.
Here’s how to download and install Windows 10

Microsoft has made it possible for anyone to download Windows 10 from its website. This makes it easy for people to install the operating system (OS), provided they have the appropriate license. Let’s take a look at some of the ways you can download and install Windows 10 on your business computers. Method 1: Download Windows 10 from Microsoft’s website The Media Creation tool makes it easy for you to download the Windows 10 ISO file for future use, or for saving to a DVD or USB flash drive as an installer. Head over to the Windows 10 download page and click Download tool now. When your download is complete, double-click the file and click Yes if a User Account Control (UAC) prompt appears. The tool will show you two options: Upgrade this PC Now or Create installation media (USB flash drive, DVD, or ISO file) for another PC. Click on the second option and click Next. Select the language, architecture, and your preferred Windows 10 edition. You can also choose Use this recommended option for this PC. Next, you will be presented with two media options: USB flash drive or ISO file. By choosing the former, you will be able to create a bootable USB drive. The latter, meanwhile, will download a file that you can use to install the OS later. The ISO file can also be burned to a DVD. Method 2: Download Windows 10 from Microsoft’s website on Mac, Linux, and Windows XP computers The Media Creation tool only works for PCs running Windows 7, 8/8.1, and 10, but you can still download the Windows 10 ISO file on Microsoft’s website. Pick your preferred Windows 10 edition and architecture, and an ISO file will begin downloading on your computer. You can save the ISO file to a flash drive to install on a different computer. You can install Windows 10 on Mac, Linux, and Windows XP/Vista PCs, but you have to purchase a license key from Microsoft to activate the OS. Method 3: Install the Windows 10 ISO directly on your Windows 7/8/8.1 PC If you’re running Windows 8 or newer, you can easily install the Windows 10 ISO by mounting it. Double click the ISO file, and Windows will read the file as though it was a DVD. From here, you can double-click setup.exe to launch the Windows 10 setup. This will replace your current Windows version with Windows 10. All the necessary files from the ISO will be copied to your computer, which will eventually restart to complete the installation. If you’re using Windows 7, you will need to download ISO mounting software such as UltraISO and WinCDEmu. As soon as you have installed one, you can follow the aforementioned steps to upgrade to Windows 10. No matter your business setup, there’s a way for you to download and install Windows 10. Should you need help setting up Windows 10 for your organization, we’d be more than happy to assist you. Published with permission from TechAdvisory.org. Source.
Work remotely, effectively with Microsoft Teams

With the COVID-19 pandemic forcing employees to work from home, you and your staff can take advantage of Microsoft Teams to stay productive. Microsoft recently enhanced this already powerful tool’s capabilities, making it easier for more people to take advantage of its advanced features. What is Microsoft Teams? Microsoft Teams combines workplace chat, video conferencing, and file storage and collaboration. It also has extensions that integrate with third-party apps, even those not made by Microsoft. As a unified communication and collaboration platform, Teams is like combining Slack, Google Drive, and Zoom into a single app. How do you get Microsoft Teams? If you have an Office 365 license, then you can readily access Microsoft Teams. But that’s not the only way to access and take advantage of the platform. Individual users can use their work or school email address to sign up through this link. You will automatically receive a license valid until January 2021. This license lets you take advantage of chat, screen sharing and recording, video meetings with up to 250 participants, and Live Events for up to 10,000 participants. If you have a Gmail or Outlook email address, you can sign up for the freemium version by clicking on this link. This version supports chat as well as group and one-on-one audio or video calling. It also gives you 10 GB of team file storage and 2 GB of personal file storage. The previous freemium version used to have various limits on users, but Microsoft opted to lift these restrictions on March 10. Another notable change is the inclusion of meetings requests, which Microsoft has committed to include in the freemium version in the future. Microsoft also offers assistance to IT professionals looking to roll out Teams for their company. Microsoft offers a free Office 365 E1 for six months. All you have to do is to contact your Microsoft partner or sales representative. If you work in the education sector , Microsoft recommends getting Office 365 A1, a free version specially created for educational institutions. This version is available for students, teachers, and administrative staff. How does Microsoft Teams remain at peak performance during the crisis? The sudden increase in remote workers is sure to put a lot of pressure on many platforms, but Microsoft Teams is more than prepared to handle the load. In particular, it is designed to anticipate problems on three core aspects: Systems during a sudden surge in usage Location during an area-specific event, such as a hurricane People during an event that affects users, such as COVID-19 To address problems in these aspects, Microsoft implements what is called an Active/Active Design. This means that the system uses multiple instances in response to user request or input. These instances run in different datacenters, which means that an event that affects one cannot affect the others. This enables the system to isolate problems and resolve them without affecting performance. Microsoft Teams offers a great opportunity for companies to remain productive in spite of the COVID-19 pandemic. If you want to get started or understand how you can take full advantage of its functionalities, just give us a call. Published with permission from TechAdvisory.org. Source.
Guide to removing these 5 PC clutter types

It doesn’t take long for computer desktops and hard drives to become cluttered, and it’s probably why your Windows 10 PC has been so slow lately. This blog post will show you how to get rid of digital clutter so that your computer will be performing like new in no time. 5 Types of PC clutter There are five types of clutter that may be causing your Windows 10 computer to underperform. Windows updates – This includes failed update downloads. While Windows will delete some of these corrupted and unusable files, others will hang around forever. Registry bloat – This includes files and applications you’ve deleted in addition to every action performed in Windows, which is recorded in your computer’s registry. Redundant entries bog down your PC. Error logs – These are log files kept by Windows whenever software in your system encounters errors in processing or crashes altogether. Just like with registry bloat, these log files accumulate and slow down your computer. User bloat – This refers to large numbers of your own files, especially if they’re unorganized. Bloatware – This refers to unwanted preinstalled software. It takes up tons of central processing unit (CPU), random access memory (RAM), and disk space, as well as poses a raft of security risks. How to remove PC clutter To remove these five clutter types and bring back Windows 10 to optimal performance, try these easy ways. Below too are actual Windows 10 screenshots to guide you. Run Disk Cleanup Windows has a built-in tool called Disk Cleanup that removes hidden junk files. To run this tool, type “disk cleanup” in the search box on the taskbar, and select Disk Cleanup from the results. Pick the drive you want to clean, then click OK. Under Files to delete, select the file types to get rid of, then click OK. Delete programs you don’t use or need Most computers come with pre-installed programs that take up space and run in the background automatically. These commonly include free trials of random programs, games, and services that you will never use. Free up memory and storage space by removing these unused programs along with redundant programs that you rarely use or don’t need. To do this, type “add or remove programs” in the search box on the taskbar, and select Add or remove programs from the results. If you see a program on the list that you no longer need, click on it, then click Uninstall. If necessary: Refresh Windows 10 If you don’t want to spend so much effort cleaning up your Windows 10 PC because of how messy it is, you can start fresh with a clean and up-to-date Windows 10 installation. This option will remove most installed apps (e.g., Microsoft Office, antivirus software, etc.) but it will keep your personal files and some Windows settings. However, it’s still best to back up your files before refreshing. To do this, type “recovery” in the search box on the taskbar and select Recovery Options in the results. Under “More recovery options,” click Learn how to start fresh with a clean installation of Windows, then click Yes in the pop-up window that says “Did you mean to switch apps? Settings is trying to open Windows Security.” This will launch the Windows Security app where you can click Get started to begin the Windows refresh process. There are innumerable ways to make your computer perform faster and more efficiently, and our Windows experts are equipped with all the tricks of the trade. Give us a call today. Published with permission from TechAdvisory.org. Source.