Better sleep with these Android tablet pointers

Your precious Android tablet is a handy tool for you to get work done and communicate on the go. But like all electronic gadgets, your Android tablet can severely disrupt your sleep patterns. For business owners like you, not getting enough sleep can dramatically affect the success and growth of your company. Here’s how you can prevent this from happening. Don’t use it before bed It’s been widely recognized that the blue light from screens and mobile devices can disrupt sleep, suppressing your body’s levels of melatonin (the hormone that induces sleep). Because of this and the distractions your tablet brings, it’s best to avoid using it a half hour before bed. However, if this isn’t possible, here are a few tips to prevent your device from causing sleep disruption. Silence distractions with Google Chrome’s Reader Mode Reading before bed can be an effective way to induce sleep. However, if you’re using your tablet to browse the Internet, you’re often exposed to ads that are sometimes loud and flashy. Just as you’re nodding off, one of these ads could startle you awake and out of slumber mode. So what can you do? Google Chrome’s Reader Mode can eliminate unnecessary ads and images, placing an emphasis on the text. To activate Reader Mode, type “chrome://flags” into your navigation bar, scroll down till you find Reader Mode triggering and choose Always from the menu. The next time you launch a page on Chrome, click on the banner that appears at the bottom of the page that reads Make page mobile-friendly. And just like that, your text will be highlighted and ads eliminated. Prevent disturbances If you let emails, calls, and text messages wake you up in the middle of the night, then you are obviously not getting enough sleep. Enter the Do Not Disturb setting. This will shut out all of these nightly annoyances so you can unplug from the world and focus on doing something important for yourself — getting a good night’s rest. To turn on Do Not Disturb, open Settings > Sound and Notification > Do Not Disturb. From here, you can choose which contacts can get through to you while you’re in dreamland. Dim your device While Android tablets don’t have a built-in feature to adjust the amount of blue light emitted, there are apps that can help you easily adjust the filter opacity, making your screen less bright. The free app Dimly is one option you can try. Monitor your sleeping habits Do you constantly wake up at night for no reason at all? Are you sleeping better or worse on nights when you consume certain food or alcohol? Or do you sleep better on the days you exercise? If you’re unsure of the answers to these questions, there’s an app that can help you. Using a motion sensor and sound recording, Sleep as Android will monitor your sleeping habits to help you discover which nights you sleep best. Then you can try to recreate those conditions to resolve your sleep issues. No matter your business, sleep is vital to your success. We hope these five tips will help you get the sound sleep you desire. If you’re curious to learn more about how your Android tablet can improve your life and business, give us a call. Published with permission from TechAdvisory.org. Source.
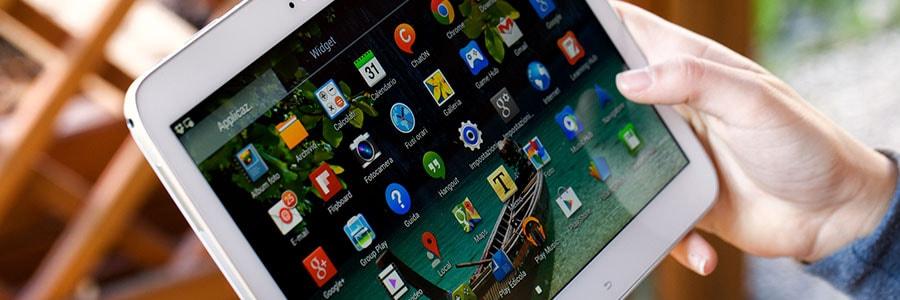
Declutter your Android device with folders

If your Android device has too many apps cluttering the homepage, finding the app you want to use can become difficult. Organize them by putting them in folders that make sense to you. Here’s how you can do it. Creating and naming folders On most devices, when you install a new app, the icon will be automatically added to your home screen, or to a screen where there is space. While this is useful, it can be a bit of a chore to find a specific app if you have dozens installed on your device. The easiest solution is to group icons together into a folder. This just takes three steps: Long-press an app you want to move into a folder (i.e., tap the app for a few seconds until you enter edit mode). Drag it over another app you want to group it with, and let go. You should see both of the icons appear inside a box. Tap Enter folder name and type the label for your folder. If you are going to use different folders, it is a good idea to pick names related to the apps they contain. For example, if you put all of your email apps in one folder, call the folder “Email.” This will make your apps easier to find. Adding/Removing apps from folders At the bottom of the box, you’ll see the “Add Apps” option. Press it, then tick the app or apps you want to include in your folder. Once you’ve made your pick, tap Add at the top-right corner of your screen. You can also add apps to your folder when you’re on your home screen. For every app you want to move, just long-press it, then drag and drop it into the folder of your choice. Lastly, to remove apps from folders, open the folder where the app is, long-press the app you want to take out, then press the “Remove from home” option. Moving folders You can move a folder’s location the same way you do so with an app: Tap and hold on the folder until the screen changes slightly and drag it to where you would like it to be. On newer versions of Android, the apps should all move to make room for the folder. Deleting folders Finally, you can delete a folder by either dragging all of the apps out of the folder, or pressing and holding on the folder until the screen changes and dragging it up to Remove. This will remove the folder and all the stored app icons, but it won’t delete the apps. If you have any questions about using an Android device, contact us today to see how we can help. Published with permission from TechAdvisory.org. Source.
Tips for removing malware from your Android device

The Android operating system is open source, which makes customization and app development easy. The problem is that cybercriminals can also access Android’s programming code, find vulnerabilities, and distribute malware through app stores. Here are some things you must do to avoid an infection. Confirm the malware infection Android devices usually exhibit strange behaviors when they’re infected with malware. A device may suddenly slow to a crawl or the battery may drain faster than expected. Other telltale signs include an abundance of pop-up ads, unusual apps installed on your home screen, unexplained data usage, and unauthorized in-app purchases. However, it’s not always easy to tell if your device was compromised, especially since hackers are becoming more proficient at concealing their actions. The best way to check for malware is to run an antivirus scan with a mobile security solution. How to get rid of malware If malware has infected your device, the most important thing to do is quarantine the threat as soon as possible. Start by rebooting your device in safe mode, which can be selected when you hold down the power button. Not all versions of Android are the same though, so if this isn’t an option, try restarting your device and holding the volume-down button when the manufacturer’s logo appears. Once you’ve entered safe mode, go to Settings, then Apps, and uninstall any suspicious apps. A quick Google search or a conversation with your cybersecurity technician should help you determine whether or not an app is dangerous. If you can’t uninstall the software, it might have administrative privileges. To fix this, open the Advanced settings menu from the Settings app, then select Security, then Device administrators, remove any app that shouldn’t have privileged access, and return to the Apps menu to uninstall it. Mobile security software should also be able to remove malicious programs hiding in your device. If the malware persists, you’ll have to do a factory reset. This option is usually located in the Backup & reset configurations within the Advanced settings menu. Keep in mind that you’ll lose the apps and files stored in your device, so it’s important to back up your data beforehand. Protecting your device from malware After you’ve successfully recovered from a mobile malware infection, make sure to update your device and security software to prevent another infection. Enabling Google Play Protect from within the app store also safeguards your device from rogue apps. When all is said and done, the best defense is to develop good security habits. Be cautious of everything you see online. Make sure to thoroughly vet apps before downloading them and don’t click on links from unsolicited texts and emails. Also, avoid public Wi-Fi networks or, at the very least, use a virtual private network (VPN) to secure the connection. Malware attacks can be devastating to your bottom line, but these tips should mitigate the risks. If you want to learn more about how you can safeguard your Android devices, our experts are always willing to assist you. Contact us today. Published with permission from TechAdvisory.org. Source.
The 101 on Android location settings

As you learn about the various features of your Android smartphone, you will come across location services and whether or not you want to approve them. If you think this convenient feature is harmless, think again. Sometimes it’s best to hide your location in your smartphone as this can affect your device’s security. With this in mind, let’s take a look at how to change the location settings on your Android smartphone. Photos and GPS tagging Your Android smartphone gives you the ability to attach GPS coordinates to the pictures you take, known as geo-locating or GPS tagging. This lets you arrange pictures in albums by location. Geo-locating images in itself isn’t a bad thing, but you can get into trouble when you broadcast sensitive locations to the world. For instance, a picture of your expensive watch with a GPS tag of your house isn’t the best idea. Here are four ways to control geo-locating photos: Go to your camera settings and you’ll find an on/off toggle. Simply go to Settings > Location and from there you can decide if you want the location saved along with your images. Download an EXIF editor and manually remove the location information from specific images. You can also turn off location services altogether by going to Settings > Location. Discrete location settings Apart from location settings in photos and GPS tagging, Android actually has three discrete location settings that allow you to set how accurately you want location reporting to be. You can find these at Settings > Location. Note that this affects your smartphone’s battery life immensely. High accuracy – This uses the GPS radio in your phone to pinpoint its exact location using data from satellites while making use of nearby Wi-Fi and cellular networks too. Battery saving – This mode only uses Wi-Fi networks and mobile networks to identify locations, and while it might not be as accurate, it will help your battery last longer. Device sensors only – This only uses the GPS radio to find you. It may take a little more time to find your location since it’s not using nearby Wi-Fi and mobile networks to get your general location first. This also uses more battery. Having your location settings turned off will not only help keep your smartphone’s security intact, but also help strengthen your battery life. Interested in learning more about Android phones and their functions? We have solutions for you and your business. Published with permission from TechAdvisory.org. Source.
Tracking data use on Android devices

Android devices are among the most feature-rich gadgets currently available. The vast majority can connect to mobile networks, but unfortunately, many service plans limit the amount of data you can use each month. If you want to avoid paying overage fees or suffering from slow connection speeds, you need to monitor how much data you’re using. Here are three things you can do to track and subsequently optimize the amount of data you are using on your Android device. Tip #1: Turn off or limit your mobile data consumption Wi-Fi is one of the easiest ways to reduce data consumption and networks are everywhere nowadays. Even malls and shopping centers often offer free Wi-Fi. Android devices can automatically switch between cellular and Wi-Fi connections, there is always the chance that you may lose connection and switch to a data network without knowing. Consider preempting this issue by disabling mobile data entirely. You can often accomplish this by pressing your finger along the top of the screen and dragging downward to reveal important phone settings, including enabling or disabling mobile data. Another option is to open your Android’s Settings app and search for the menu that contains your mobile data configurations. From there you can turn off data entirely or set data limitations based on your service plan’s allowance. Tip #2: Limit background data Even if you don’t realize it, many of your apps use data while your Android device is locked. They keep running in the background and their data usage can take significant chunks out of your monthly allowance. To limit the use of background data: Open your Android’s Settings app. Select the Apps menu (the name varies based on the device manufacturer; look for the menu that lists all your apps). Tap on an app that you don’t want to use background data. Select Restrict app background data. The apps menu provides lots of information about how much data various apps are using, both in the foreground and background. Even if you don’t use this menu to configure background data allowances, it’s a great place to learn about data hogs. Tip #3: Use Chrome’s data compression All Android devices have the Google Chrome web browser installed right out of the box. Before you consider trying another browser, keep in mind that Chrome has some of the best data-saving features. For example, when data compression is enabled, the websites you visit are sent to Google’s servers to ensure they are optimized for mobile devices and unnecessary information is removed. To turn this feature on, open the Chrome app, tap the button with three horizontal dots in the upper right corner, then select Settings, followed by Data Saver, and toggle the On switch. Google claims this can save up to 60% of data usage in the browser and that it detects malicious websites and harmful content. There are dozens of other ways you can protect yourself and save data when using your Android device. If you’d like additional help, contact us today. Published with permission from TechAdvisory.org. Source.
New security features for your Android device
Mobile devices can be considered an extension of ourselves, containing personal information like web browsing behavior, email exchanges, bank transactions, and other private data. Losing your smartphone or having it stolen is a nightmare, but the good news is that Android devices have security tools you can use to keep your data safe. Set a strong screen lock The single most important thing any smartphone owner can do is use a strong, unique passcode or swipe pattern to prevent unwanted access to their device. Avoid using obvious codes such as your birthday or pet’s name; instead, use alphanumeric combinations that are much harder to crack. To enable a screen lock, simply head over to Settings > Security. Select Screen Lock and pick your preferred password lock type and set Automatic Lock after a certain period of time. From then on, you will need to enter your passcode or swipe pattern each time you try to access your phone. Use alternative unlocking methods Newer Android devices have advanced security tools for extra layers of protection. These include features like fingerprint authentication, iris scanning, and facial recognition. To see what features can be enabled on your phone, go to Settings > Security. In addition, if you are a Google Nexus or Pixel user, your device is equipped with a range of Smart Lock options that, when activated, keeps your phone unlocked when it’s detected to be on your body or near a trusted Bluetooth device. These settings can also be found under Security. Enable Find My Device Google’s Find My Device is a locator service that lets you track or wipe data from a lost or stolen Android phone, tablet, or wearable. All you need to do is add your Google account to your Android device and turn on the location feature to enable the service. To locate your device remotely, install the Find My Device app or access it via a web browser. Once you’re logged in, a dashboard will show an approximate location of your phone and provide you with four options: locate your device, play sound, lock your device (and add a short note), or erase device that permanently deletes all data stored. Revisit your app permissions Does that photo-editing app you just downloaded really need access to your Contact list? If you sometimes wonder why some apps need so many permissions or why they request to access data unrelated to their purpose, then you are asking the right questions. Remember to take control of the features that you allow your apps to access, especially from dubious developers who might steal your information. If you have Marshmallow or later versions of Android, go to Settings > Apps and then select the app. Click on Permissions and revoke all those permissions you’re uncomfortable with. Encrypt your phone Device encryption protects your data by converting it into a format that prevents unauthorized individuals from accessing it without the key. This is particularly important if someone manages to find a way around your lock screen and pull data from your device. Android handsets running on Lollipop or higher have full encryption enabled by default. But if you’re using an older device, encryption options can also be found under Security. It never hurts to take extra steps to make sure your information is protected. Some of these might take time, but trust us, it’s totally worth the extra minutes. If you need more tips to secure your personal or even your company’s files, email, or data, we’ll be happy to help. Security is what we do best, so give us a call today! Published with permission from TechAdvisory.org. Source.
How to transfer files from Android via USB cable
You can use Wi-Fi to transfer files between your Android phone and your PC or Mac, but if an internet connection is unavailable or unstable, there’s another option: use your trusted USB cable. Read on to find out how your USB cable can help you move files between devices without a hitch. To transfer files from your Android device to your computer, you need the following: Your Android phone A computer with a USB port A USB cable Android file transfer for Windows 1. Unlock your phone. 2. Plug it into your computer’s USB port using a cable. 3. Your Android phone will display a “Charging this device via USB” notification. Tap on it. 4. Tapping on the notification will display other options. Select File Transfer under “Use USB for.” 5. Your computer will show a file transfer window. Drag and drop files from this window to your preferred location on your computer. 6. Once you’re done, eject your device from Windows by right-clicking the device and printers manager on the task bar and selecting your device’s name on the list. 7. Unplug your USB cable. Android file transfer for Mac For Mac users, there are several additional steps you need to do if you want to transfer files from your Android device, but the remaining steps are pretty much the same to Android file transfer for Windows. Download and install Android File Transfer on your computer. Take note that this app only works on Macs running on OS X 10.7 or later. Open the Android File Transfer app. You need to open it the first time you use it, but the next time you plug in your device, it will automatically open. Unlock your Android app and connect it to your Mac using your USB cable. On your phone, tap on the notification that says “Charging this device via USB.” Your phone will then display other USB options for your device. Under “Use USB for,” choose File Transfer. This will prompt your computer to display an Android File Transfer window. Drag and drop files from this window to your preferred location on your computer. After backing up your data, eject your USB by right-clicking the icon for the external device on your desktop and selecting “Eject [volume name].” Alternatively, you can drag the external volume icon into the trash can in the Dock. Unplug your USB cable. Transferring files from one device to another is a piece of cake, isn’t it? But data backup is more than just copying and moving files. Do you want to learn more about making your business devices and computers disaster-proof? Our dedicated IT experts can perform routine backup solutions that go beyond drag-and-drop. With their knowledge in security, data recovery, and business continuity, you never have to fear losing your data again. Call us today. Published with permission from TechAdvisory.org. Source.
Fight mobile malware with MTD

Cybercriminals will do almost anything to steal your data. One of the easiest ways to do that is exploiting vulnerabilities in your employees’ mobile devices. If you’re looking for a way to beef up your security strategies, adopting mobile threat detection (MTD) is a good place to start. MTD and machine learning Mobile threat detection is an all-around solution that prevents physical tampering, network-based attacks, and malware infections. MTD is supported by a machine learning mechanism, which enables devices to recognize usage patterns and flag anything that is outside of the norm. MTD is a very scalable solution, able to monitor dozens of Android mobile devices. When one of them deviates from the rest, machine learning logs the anomaly and notifies administrators. Does MTD detect malware? Most malware programs are cleverly disguised as legitimate and useful apps. The key to finding and defending against malware is recognizing irregular patterns in user behavior and how individual devices function. A simple scan is not enough to protect your device, especially from attacks such as phishing scams based on thorough target research. Without machine learning, observing user and application behavior for suspicious signs would be an overwhelming task. It doesn’t provide total protection though. Mobile security also needs to include ways to blacklist certain apps, prohibit connecting to unsecured networks, and remotely wipe a device when all else fails. How to implement an MTD solution Integrating MTD into your mobile security strategy requires a thorough evaluation of important factors, including industry regulations and the sensitivity of the data stored and/or exchanged on your mobile devices. Ideally, it will be part of a larger solution that allows you to inspect a mobile device’s hidden weaknesses and block harmful network traffic. Developing strong defenses for mobile devices is fast becoming a critical component in many businesses’ cybersecurity strategies. And although mobile threat detection remains an imperfect means to detect malware, it is far more powerful than traditional anti-malware solutions. Businesses like yours need comprehensive security solutions to fend off cyberattacks, whether on your PCs, laptops, or smartphones. For expert IT security recommendations, call us today! Published with permission from TechAdvisory.org. Source.
Feature-loaded: Android 9 Pie is here!
Android 9 Pie is the most recent version of Google’s mobile operating system. Officially released on August 6, 2018, it is more powerful and secure than the Oreo version. Here are some new features that will make you want to have a piece of the pie. Enhanced security features In Android 9 Pie, apps won’t be able to access your microphone, camera, and SensorManager sensors while running in the background. This prevents apps from abusing legitimate permissions they have been granted. Another security enhancement is the lockdown mode. In case of an emergency, it lets you disable face- and fingerprint-based unlock, or any smart unlock options you have set up. You can enable this through Settings > Security & location > Lock screen preferences > Show lockdown option. To activate it, you just need to hold down the power button whereupon a new option will appear above the screenshot icon. When you tap the lockdown icon, your phone will immediately lock and hide all lock screen notifications. To unlock it, you’ll need to enter your PIN, pattern, or password. New accessibility menu Android Pie 9 offers a new menu with easier-to-reach shortcuts for common functions, which are especially helpful for users who need assistance and those having difficulty using Android’s gestures. To enable this menu, go to Settings > Accessibility > Accessibility Menu and turn on the Use service slider. Confirm the prompt, and a new icon to the right of the navigation bar will appear. Tapping it will bring up a large menu with shortcuts to your most commonly used functions such as volume, recent apps, and quick settings. New gesture navigation If you want a break from the usual Back, Home, and Recent buttons, you may want to try the new gesture-based system. It lets you navigate through the interface more fluidly and intuitively. To enable this, go to Settings > System > Gestures > Swipe up on Home. Here’s how the gesture system works: 1. Tap the new elongated Home button to go home. 2. The Back button will appear in its usual position. 3. Open the Recents view by swiping up on the Home button. Move left and right to view the list. Swiping up will clear a recent app, while pressing and holding an app’s icon will let you see the Split screen option. In this view, you can interact with apps to select and copy text. 4. Swipe up on the Home button twice to open your app drawer. 5. Swipe right and then hold down Home to slowly scroll between apps. Release to open the center app. 6. To switch to the previous app, swipe right quickly and release. 7. Pressing and holding the Home button will open Google Assistant as usual. Adaptive battery and brightness Adaptive Battery improved upon the Doze feature, which was introduced in Android 6 Marshmallow. Doze puts idle apps into a “deep sleep,” preventing them from draining the battery. Android 9 Pie goes a step further by learning about the user’s most utilized apps and services and adjusting rarely used apps to consume less battery. App actions App Actions predict what you want to do so you can quickly start tasks the next time you use your phone. So if you chat with coworkers on Hangouts regularly, you might see an App Action that will direct you to Hangouts. These are just five of the many new features of the Android 9 Pie. Talk to us and learn why this OS is right for you. Published with permission from TechAdvisory.org. Source.
Head to head: O365 vs. G Suite for Android
For business owners looking to increase employee productivity, one of the most heated debates is over which cloud productivity software is best. If your company uses Android devices, we have some tips on whether Microsoft Office or Google Apps is the better choice for you. Text-based documents Google Docs sacrifices a few features in the name of speed. It makes simultaneous editing from multiple users, syncing with cloud storage, and sharing documents with colleagues on an Android device a breeze, but it doesn’t afford users the same level of customizability as Office 365. Microsoft’s productivity platform has been evolving for decades, which means there’s very little it can’t do. Depending on the Android device you have, this can translate to a slower, less responsive user experience. Spreadsheets Tables that store data and simplify calculations may seem pretty straightforward, but Google has found a way to set its offerings apart. Although its Sheets lacks powerful features compared to Microsoft’s Excel, it does have some cross-platform integrations worth considering. For example, Google Forms is much better at surveying users and organizing their responses into easy-to-use spreadsheets. The main selling point of Excel on Android is that it can do almost anything on a mobile device that it can do on a desktop. Using templates, creating charts, and formatting Office 365 spreadsheets aren’t any more difficult to do with just finger gestures than to do them using a mouse. Presentations Similar to Sheets, G Suite’s Slides shines when it comes to integrations. Adding images to a presentation from the web is intuitive with Google’s built-in search function, and Q&A sessions are streamlined with customized URLs where participants can submit questions that are displayed on the presenter’s screen. PowerPoint was the original platform for creating presentations, and its core functionalities are unmatched, even on Android devices. There are no shortages of pre-made themes, transitions, and layouts, which means the time between tapping Create New and saving the final draft is much shorter. Conclusion: Speed vs. functionality The difference between these two platforms on Android is obvious. Both will be able to accommodate basic tasks, but G Suite prioritizes responsiveness and simplicity, while Office 365 favors having more features and a broader range of capabilities. Creating eye-catching work on a six-inch screen isn’t ideal, but depending on your business model, it can revolutionize how your team works. For advice on all things mobile, call us today! Published with permission from TechAdvisory.org. Source.